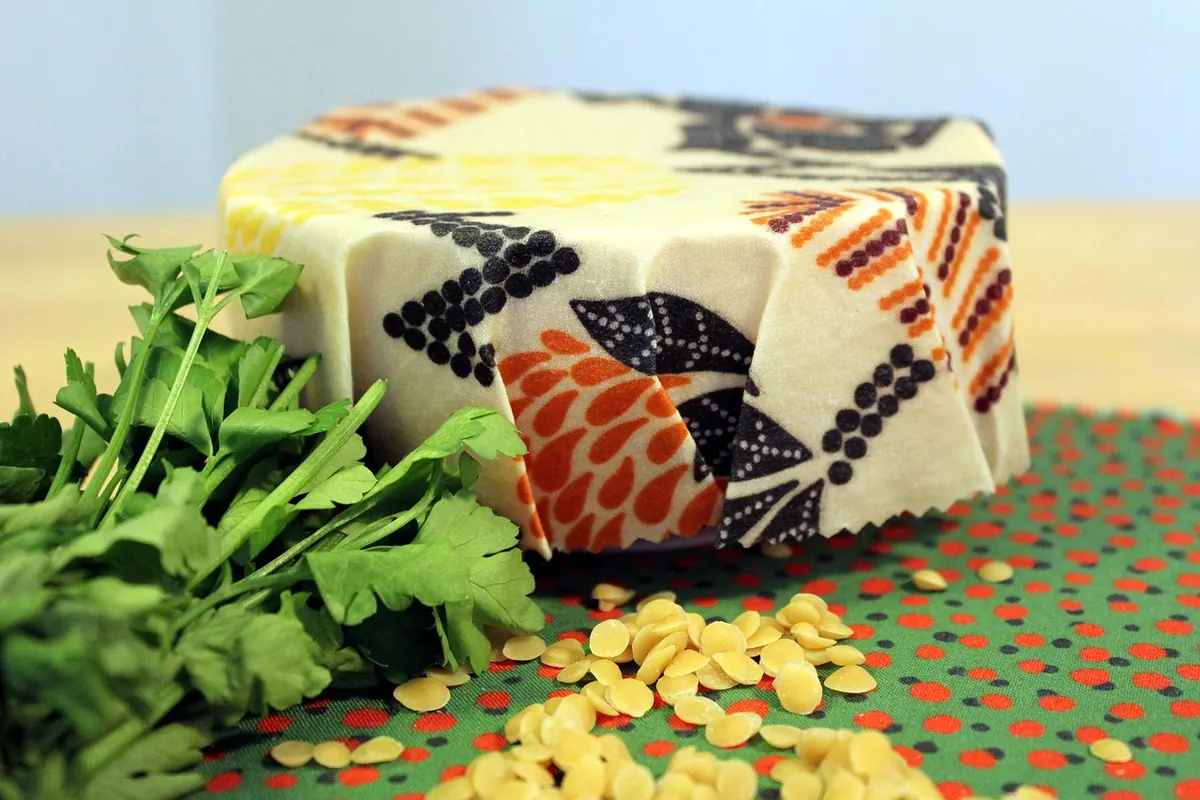
Beeswax wraps are quietly brilliant once you understand how they work. Warm the fabric between your palms and the coating turns slightly tacky, so it grips itself, a bowl rim, or the cut face of a cheese. Use them like cling film and they will slide off, crack, or start to smell. Use them like the waxed cotton they are, and three or four wraps will cover most of what you used to wrap in plastic.
Here is how to wrap food properly, how to clean a wrap without ruining the coating, and how to bring a tired one back to life so it keeps going for months rather than weeks.
First, how a beeswax wrap actually behaves
Most wraps are cotton coated with a blend of beeswax, tree resin and a plant oil such as jojoba. The wax makes them water-resistant and a little sticky; the resin adds grip; the oil keeps everything flexible so the coating doesn't flake. That explains both what works and what doesn't.
Two rules follow. Heat softens the coating, so never take a wrap near a hob, a hot dish or a microwave. Water repels it, so a wrap won't cling to a wet bowl or a damp cucumber — pat the surface dry first and it will hold beautifully.
How to wrap food, by shape
The technique is the same in every case: cup the wrap in your hands for a few seconds to warm it, then press the seams firmly with your fingers rather than stretching the fabric. Cold wax cracks; warm wax moulds.
Sandwiches, pastries and snacks
Put the item in the middle, fold one side over the top, fold the other side over that, then tuck both ends underneath and press along the joins. A 25cm wrap handles a standard sandwich comfortably; go up to 30cm for a doorstep slice or a sandwich with salad in it.
Cheese
Hard cheese is one of the best uses for a beeswax wrap. It keeps the cut surface from drying out while still letting the cheese breathe slightly, which tight plastic doesn't. Wrap it loosely rather than pulling the fabric taut, and store it in the fridge as usual.
Half an avocado, onion or lemon
Press the wrap directly onto the cut surface, then fold the rest of the fabric round the back. Having the waxed side flat against the exposed flesh is what slows browning and stops the smell of onion drifting through the fridge.
Bowls, jars and leftovers
Choose a wrap at least 5cm wider than the rim. Lay it over the top, run your fingers around the rim to seal, then smooth the overhang down the sides. Ideal for a bowl of salad, leftover rice, or dough proving on the worktop.
Bread
A wrap is fine for the cut end of a loaf, but bread generally prefers paper or a bread bin. Wrapped tightly for days, a crust goes soft and the inside can turn damp. Wrap the cut face, leave the rest in paper.
Cleaning takes two minutes
Cool water, a drop of mild washing-up liquid and your hands do the whole job.
- Rinse the wrap under cool or lukewarm running water to shift crumbs and grease.
- Add a small drop of mild washing-up liquid and rub the fabric gently between your fingers, working both sides.
- Rinse thoroughly until the water runs clear — a film of soap stops the wrap sticking.
- Shake off the excess and drape it over a rack or a clean tea towel to air dry. It doesn't need to be bone dry before its next use.
What you avoid matters more than what you do. Skip hot water, the dishwasher, the washing machine, bleach, vinegar and anything abrasive. Heat melts the coating away; harsh cleaners break down the wax until the wrap no longer grips. For raw meat and fish, use a plate or a container instead — wax holds onto smells, and you don't want to be scrubbing a wrap to be sure it's clean.
If a wrap has picked up a strong smell from garlic, curry or blue cheese, soak it in cool water with a spoonful of bicarbonate of soda for ten minutes, then wash and dry as usual.
Reviving a wrap that has lost its grip
After a few months of regular use the coating thins. The signs are a wrap that no longer clings, feels dry and papery, or has visible cracks along the folds. You don't need to replace it — a five-minute refresh usually brings it back.
Line a baking tray with baking parchment, lay the wrap flat and scatter over a light grating of beeswax: roughly a teaspoon for a 30cm wrap. Slide the tray into a low oven — around 100°C is plenty — for a few minutes, just until the wax melts. Take it out, spread the melted wax evenly with a pastry brush or the back of a spoon, then lift the wrap by two corners and let it cool flat. It will be hot, so keep children and pets clear of the tray.
No oven space? Grate the wax over the wrap, cover with parchment and press with a dry iron on a low setting, no steam, until it has melted. Re-waxing blocks are sold for exactly this job, or you can melt plain beeswax with a little jojoba oil to make your own.
Storing them and making them last
- Keep wraps rolled loosely or folded flat in a drawer, away from radiators and direct sun.
- Let hot food cool before you cover it; steam softens the wax and shortens its working life.
- Rotate three or four wraps so no single one does all the work and wears out first.
- Keep tomato, turmeric, beetroot and curry away from pale wraps unless you don't mind staining.
- Don't put them in the microwave or oven; they are perfectly happy in the fridge and freezer.
- If a wrap has been used for cheese, keep it for cheese — the coating does hold on to flavours over time.
When to retire a wrap
A wrap that has been refreshed twice and still won't hold, has holes in the fabric, or smells permanently of last week's fish has earned its retirement. Cut it into strips and keep it with your firelighters, or compost it if the maker confirms the blend is compostable — some resins don't break down as readily as cotton and beeswax. Either way, don't put it in the recycling bin, where the coating causes problems.
Start with three, not ten
Two or three wraps in different sizes are enough to find out what you'll actually use. A large one covers bowls, a medium one handles sandwiches and cheese, and a small one is handy for half a lemon or the end of a cucumber. Between them they take over most of the jobs cling film used to do; anything wet, hot or raw can go in a tub.
Wash them when you wash up, let them dry on the rack, and give them a wax top-up when the grip starts
Photo: RikaC / Pixabay